I’ve been building and tuning gaming rigs for years, and I can tell you this: your PC is holding back more performance than you think.
You bought good parts. Maybe even great ones. But out of the box, they’re not running at their best. You’re getting lower frame rates than you should. Your temps are higher than they need to be. And you’re leaving power on the table.
Here’s the thing: most people stop at the basic stuff. They build their rig and call it done. But the real gains come from the modifications that actually matter.
I’ve spent years optimizing systems for competitive gaming environments where a single dropped frame can cost you a match. I know what works and what’s just noise.
This guide covers the masticelator mods pc that deliver real results. Not theory. Not benchmarks that look good on paper. Actual performance you’ll feel when you’re in game.
We’re going beyond the usual advice. You’ll learn the hardware tweaks that drop temps and boost clocks. The software modifications that squeeze out every bit of performance. The tuning methods that turn a good system into a dialed-in machine.
No fluff. No generic tips you’ve seen a hundred times.
Just the specific changes that will make your custom PC run the way it should have from day one.
Core Hardware Tuning for Raw Power
CPU Undervolting: The Free Performance Boost
Your CPU is probably using more voltage than it needs.
I’m serious. Intel and AMD ship processors with voltage curves that prioritize stability across millions of different motherboards and silicon lottery variations. They play it safe. Which means your chip is likely running hotter than necessary.
Here’s what happens when you undervolt.
You drop the voltage just enough that your CPU still runs stable but generates less heat. Less heat means your cooler can actually do its job. And when temperatures drop, your processor holds those high boost clocks instead of throttling back after 10 seconds of load.
I’ve seen CPUs drop 15 to 20 degrees Celsius just from a modest undervolt (around 80 to 100mV). That’s the difference between hitting 95C and thermal throttling versus sitting comfortably at 75C while maintaining full boost.
The process isn’t complicated but you need patience. Start with a small voltage offset. Run Cinebench or Prime95 for 30 minutes. If it crashes, back off a bit. If it passes, try going lower. Repeat until you find that sweet spot where temps are down but stability holds.
You’ll feel the difference immediately in games. Frame pacing smooths out because your CPU isn’t bouncing between boost states. Rendering times drop because sustained performance actually stays sustained.
Some people say undervolting is risky or voids warranties. But here’s the truth. You’re reducing voltage, not increasing it. The worst that happens is a crash and you reset to defaults. No permanent damage.
Memory Tuning Beyond XMP/EXPO: Why Latency is King
XMP and EXPO profiles are marketing.
They give you higher frequencies because big numbers sell. But frequency alone doesn’t tell the whole story. What really matters for gaming and real-time applications is latency. How fast can your CPU actually access the data it needs?
Think about it like this. You can have a highway with 10 lanes (high frequency) but if every car has to stop at a toll booth every mile (high CAS latency), traffic still crawls.
I see people running DDR5 at 6000MHz with CL40 timings thinking they’ve got the best setup. Then I show them the same kit running at 5600MHz with CL30 timings and their 1% lows in games jump by 10 to 15 frames.
That’s latency at work.
Tightening your RAM timings takes more effort than clicking XMP in BIOS. You need to understand what CAS latency, tRCD, tRP, and tRAS actually do. You’ll spend time in Masticelator forums reading about masticelator mods pc and testing different subtiming combinations.
But the payoff is real. Lower latency means your CPU spends less time waiting for data. In competitive shooters, that translates to smoother frame delivery. In open world games, it means fewer stutters when streaming assets.
Start with your primary timings. Drop CAS latency by one step and test with MemTest86 or TM5. If stable, keep going. Once you hit instability, back off and move to secondary timings.
The difference between plug and play and properly tuned memory? It’s the gap between good performance and performance that actually FEELS different when you’re in game.
Advanced Cooling Strategies for Peak Stability
Your gaming rig runs hot.
I mean really hot. You’ve got a beast of a GPU and a CPU that pulls serious power, but your temps are creeping into the danger zone during long sessions.
Here’s what most people do wrong.
They just slap more fans in their case and call it a day. Then they wonder why their system still sounds like a jet engine and runs at 85°C.
The problem isn’t that you need more cooling. You need smarter cooling.
Mastering Case Airflow Dynamics
Let me clear something up right away.
Airflow isn’t about cramming as many fans as possible into your case. It’s about creating a path that actually moves heat away from your components.
You’ve got two approaches: positive and negative air pressure.
Positive pressure means more air coming in than going out. This keeps dust down because air escapes through every crack instead of getting sucked in. Negative pressure does the opposite (more exhaust than intake), which can cool better but turns your case into a dust magnet.
I run slightly positive pressure in my builds. Two or three intake fans at the front, one or two exhaust at the rear and top. The key is pointing that airflow right at your GPU and CPU.
Now here’s where it gets good.
Custom fan curves based on actual component temps. Most people set their fans to respond to CPU temperature only. But your GPU often runs hotter and needs different treatment.
Set your intake fans to ramp up with GPU temp. Set your exhaust to follow CPU temp. You get targeted cooling without constant noise.
| Component | Fan Response | Target Temp Range |
|---|---|---|
| CPU | Rear/Top Exhaust | 65-75°C |
| GPU | Front Intake | 70-80°C |
The High Impact Low Cost Thermal Mods
Stock thermal paste is garbage.
I said it. Your CPU and GPU came with the cheapest compound the manufacturer could get away with. After a year or two, it dries out and your temps climb.
Replacing it takes maybe 20 minutes and costs about $10 for a good tube of thermal paste. I’m talking about compounds like Thermal Grizzly Kryonaut or Arctic MX-6. You’ll see temp drops of 5 to 10 degrees just from this swap alone.
Clean off the old paste with isopropyl alcohol (90% or higher). Apply a rice grain sized dot in the center of your CPU. Let the cooler spread it when you mount it down.
But here’s something most game masticelator mods minpakutoushi journals don’t talk about enough.
Modern Intel CPUs have a bending problem. The Integrated Heat Spreader (IHS) actually warps under the pressure of the stock mounting bracket. This creates uneven contact with your cooler and kills your temps.
An aftermarket contact frame fixes this for about $15. It replaces Intel’s bracket with a flat design that applies even pressure. People report temp drops of 8 to 15 degrees from this alone.
You don’t need to spend $200 on a new AIO cooler. Sometimes the best Masticelator Mods pc tweaks cost less than lunch and take 30 minutes to install.
Your system will run cooler and quieter. And you’ll actually be able to hear your game audio again.
Functionality Mods: Making Your PC Work for You
OS Debloating for a Snappier System
I’ll never forget the first time I debloated a fresh Windows install.
My PC went from taking 45 seconds to boot to under 15. Games that used to stutter during loading screens just stopped doing it.
The difference was night and day.
Here’s what actually matters. Your PC comes loaded with software you’ll never use. Candy Crush. Xbox Game Bar notifications you didn’t ask for. Background services that eat RAM like it’s going out of style.
Start with your startup programs. Press Ctrl+Shift+Esc and click the Startup tab. Anything you don’t recognize or need? Disable it.
Next, tackle the bloatware. Go through Add/Remove Programs and get rid of trial software, manufacturer utilities you never open, and those weird apps that came pre-installed.
Then hit Windows Services. Type services.msc in the search bar. Disable things like Print Spooler (unless you actually print), Windows Search (if you don’t use it), and SysMain (which tries to predict what you’ll open next but usually just wastes resources).
You’ll free up 2-4GB of RAM on average. Your CPU usage at idle will drop. Everything feels faster because it actually is faster.
Streamlining Actions with Custom Macros
Some people think macros are cheating.
They’re wrong. Macros are just smart shortcuts.
I use a cheap macro pad for my most common tasks. One button launches Discord, Spotify, and my browser all at once. Another opens my entire work setup with file explorer, notes app, and email.
In games? That’s where it gets fun.
Strategy games like Age of Empires or StarCraft let you bind entire build orders to single keys. Instead of clicking through five menus to queue up units, you press one button.
MMOs benefit too. I’ve got a macro that activates my buff rotation in Final Fantasy XIV. What used to take six button presses now takes one.
You don’t need expensive hardware either. Software like AutoHotkey is free. Logitech and Razer mice come with macro software built in.
The key is finding your repetitive tasks and automating them. If you do something more than ten times a day, it deserves a macro.
Aesthetic Mods with a Functional Purpose
Custom cable sleeving looked like pure vanity to me at first.
Then I actually tried it.
Turns out when your cables are the exact length you need and color-coded, cable management becomes stupid easy. You’re not fighting with excess length or trying to hide ugly ketchup and mustard cables behind your motherboard tray. For additional context, Play Masticelator Mods covers the related groundwork.
Better cable management means better airflow. I dropped my case temps by 3-4 degrees Celsius just by cleaning up my cables properly.
Vertical GPU mounts work the same way. Yeah, they look cool. But they also solve GPU sag, which can stress your PCIe slot over time.
Some cases see better temps with vertical mounting because the GPU fans pull fresh air directly instead of fighting against the motherboard. Other cases see worse temps because the GPU sits too close to the side panel.
Test it in your specific setup. Use HWMonitor or MSI Afterburner to check before and after temps.
The best masticelator mods pc builds combine form and function. You want parts that look good and actually improve performance or longevity.
RGB fans? Get ones with good static pressure. Custom backplates? Pick ones that help with cooling. Tempered glass panels? Make sure your airflow doesn’t suffer.
Pretty doesn’t have to mean impractical.
For the Enthusiast: High-Risk, High-Reward Mods
GPU Power Limit Modifications (Shunt Modding)
You want more performance out of your GPU.
I mean, who doesn’t?
Shunt modding lets you trick your graphics card into pulling more power than the manufacturer intended. You’re basically bypassing the safety limits that keep your GPU from drawing extra watts.
The result? Higher clock speeds. Better benchmark scores. Bragging rights in your Discord server.
But let me be clear about something.
This is one of those masticelator mods that can brick your hardware in seconds. You’re soldering or physically modifying resistors on your GPU’s PCB. One slip and you’ve got a $800 paperweight.
Your warranty? Gone the moment you touch those components.
And even if you do it right, you’re pushing power delivery systems beyond their design specs. VRMs can fail. Capacitors can pop. Your card might work fine for a month, then die during a random gaming session.
Some enthusiasts say the performance gains are worth it. That if you know what you’re doing, the risk is manageable.
Maybe. But most people don’t know what they’re doing until after they’ve already destroyed something.
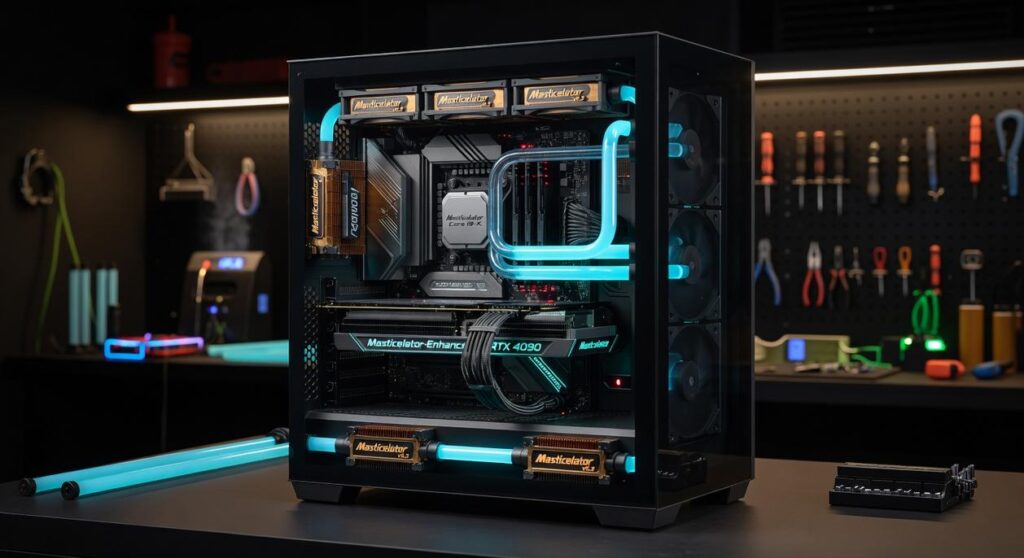
Full Custom Water Cooling Loops
Now we’re talking about masticelator mods pc builders actually get excited about.
Custom water cooling isn’t just about dropping temps. It’s about building something that’s yours. A system that looks exactly how you want and performs better than anything you can buy off the shelf.
AIOs are fine. They work. But they’re limited to cooling one component at a time.
A custom loop? You can cool your CPU, GPU, and even your VRMs in a single circuit. Water flows through each block, pulling heat away more efficiently than any air cooler ever could.
The benefits stack up fast. Lower temps mean you can push higher overclocks. Better cooling means quieter operation because your fans don’t need to scream at 100% all the time.
Plus, there’s something satisfying about watching coolant flow through clear tubing while your temps stay in the 50s under load.
Your Blueprint for a Superior PC
You now have a complete roadmap to make your PC perform like it should.
No more accepting stock settings that leave performance on the table. No more listening to fans that sound like jet engines. No more settling for a workflow that slows you down.
These modifications work because they build on each other. Better cooling lets you push performance further. Smart tuning reduces heat and noise. Custom workflows save you time every single day.
The best part? You don’t need to tackle everything at once.
Pick one mod and start this weekend. Set a custom fan curve in your BIOS. Undervolt your CPU using ThrottleStop or Ryzen Master. You’ll see the difference immediately.
masticelator mods pc because we know you want more from your machine. We’ve tested these methods and they deliver real results.
Your PC has potential that’s just sitting there. Time to unlock it.
 Esports Analyst & Content Strategist
Ask Jose Rayombers how they got into core gameplay mechanics and strategies and you'll probably get a longer answer than you expected. The short version: Jose started doing it, got genuinely hooked, and at some point realized they had accumulated enough hard-won knowledge that it would be a waste not to share it. So they started writing.
What makes Jose worth reading is that they skips the obvious stuff. Nobody needs another surface-level take on Core Gameplay Mechanics and Strategies, Esports Team Insights, Gaming Gear Optimization Tips. What readers actually want is the nuance — the part that only becomes clear after you've made a few mistakes and figured out why. That's the territory Jose operates in. The writing is direct, occasionally blunt, and always built around what's actually true rather than what sounds good in an article. They has little patience for filler, which means they's pieces tend to be denser with real information than the average post on the same subject.
Jose doesn't write to impress anyone. They writes because they has things to say that they genuinely thinks people should hear. That motivation — basic as it sounds — produces something noticeably different from content written for clicks or word count. Readers pick up on it. The comments on Jose's work tend to reflect that.
Esports Analyst & Content Strategist
Ask Jose Rayombers how they got into core gameplay mechanics and strategies and you'll probably get a longer answer than you expected. The short version: Jose started doing it, got genuinely hooked, and at some point realized they had accumulated enough hard-won knowledge that it would be a waste not to share it. So they started writing.
What makes Jose worth reading is that they skips the obvious stuff. Nobody needs another surface-level take on Core Gameplay Mechanics and Strategies, Esports Team Insights, Gaming Gear Optimization Tips. What readers actually want is the nuance — the part that only becomes clear after you've made a few mistakes and figured out why. That's the territory Jose operates in. The writing is direct, occasionally blunt, and always built around what's actually true rather than what sounds good in an article. They has little patience for filler, which means they's pieces tend to be denser with real information than the average post on the same subject.
Jose doesn't write to impress anyone. They writes because they has things to say that they genuinely thinks people should hear. That motivation — basic as it sounds — produces something noticeably different from content written for clicks or word count. Readers pick up on it. The comments on Jose's work tend to reflect that.