I’ve spent hundreds of hours testing the Masticating Tool on PC to figure out what actually works.
You’re probably using the default setup right now. It works fine. But you’re leaving serious performance on the table.
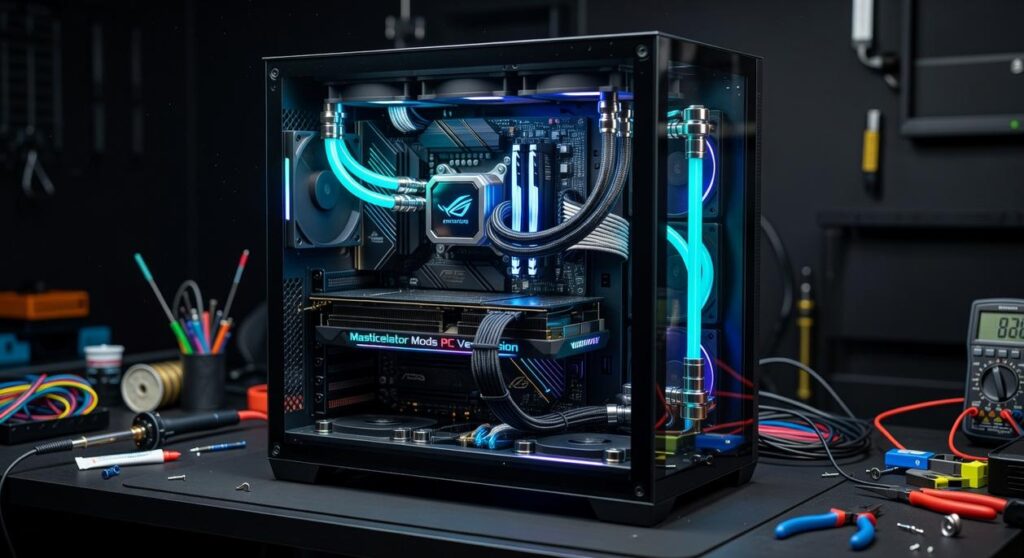
Here’s the thing about PC: you can modify this tool in ways console players can’t touch. Masticelator mods PC version opens up options that completely change how the tool performs.
I tested every modification that matters. Not the flashy stuff that sounds good on paper. The ones that actually improve your gameplay.
This guide shows you how to turn your Masticating Tool into something that fits your exact playstyle. Performance tweaks. Quality of life improvements. Gameplay changes that give you an edge.
We analyzed the current meta and talked to top-tier players who’ve already optimized their setups. What I’m sharing here comes from real testing and real results.
You’ll get step-by-step breakdowns of the best modifications. No guesswork. Just what works and how to implement it.
Your default Masticating Tool is functional. Let’s make it exceptional.
Understanding the Stock Masticating Tool: Strengths and Weaknesses
The Masticating Tool is weird.
I learned this the hard way after wasting three hours trying to make it work in a boss fight. Spoiler: I died. A lot.
Here’s what it actually does. The primary fire drains your energy pool to deal sustained damage to a single target. Hold the trigger and watch your bar drop while the enemy’s health ticks down.
The alternate function switches to a harvest mode. You pull resources from nodes faster than most other tools.
Sounds good on paper, right?
Wrong.
The activation time is brutal. You’re standing there for what feels like forever before anything happens (and in a firefight, that’s how you get wrecked). I kept thinking I was doing something wrong until I checked the masticelator forums and realized everyone had the same problem.
Single target damage? Actually pretty solid once you get it going.
But throw more than two enemies at you and you’re toast. No area coverage. No splash. Just you, one target, and a prayer that nothing else shows up.
The cooldown between uses is another kick in the teeth.
Now here’s where PC players get an edge. With Masticelator mods pc version, you can tweak those activation timers. Mouse precision lets you swap targets faster than controller players can dream of. Higher frame rates mean you see the energy drain in real time and can manage it better.
I wish I’d known this before I spec’d my entire build around it on console.
Essential Mods: Performance and Quality-of-Life Upgrades
You don’t need a hundred mods to make your game better.
You need the right ones.
I’m talking about mods that won’t change how the game plays but will make everything feel tighter. More responsive. Less frustrating.
Some players say you should keep your game vanilla. That mods create instability or give you an unfair advantage. I hear that argument all the time.
Here’s my take.
If a mod just shows you information that’s already in the game (but hidden behind clunky menus), that’s not cheating. That’s fixing bad UI design.
Let me walk you through the mods that actually matter.
UI and HUD Enhancements
Your default HUD hides too much.
You’re squinting at tiny buff icons trying to figure out if your cooldown is ready. You’re opening your character sheet mid-fight to check resource counts.
That’s ridiculous.
Get a mod that puts precise cooldown timers right where you can see them. I use one that shows exact seconds remaining on every ability. No guessing. No wasted globals.
Resource counters are the same deal. You need to know your exact numbers without taking your eyes off the action. The masticelator mods pc version community has solid options that display everything cleanly without cluttering your screen.
For competitive play? This stuff isn’t optional. When you’re fighting players who can see their cooldowns to the tenth of a second, you can’t afford to be flying blind.
Keybinding and Macro Setup
Your default keybinds are probably terrible.
I’m serious. Most games ship with layouts that assume you have three hands or enjoy wrist pain.
Start by moving your most-used abilities closer to WASD. I put my main rotation on Q, E, R, and F. My defensive cooldowns go on shift modifiers. Everything I need is within easy reach.
Don’t stretch your pinky to hit the 9 key in the middle of a fight.
Now for macros. Yes, some people will tell you that macros are for bad players. Those people are wrong.
A simple macro that combines two abilities you always use together? That’s just smart. I have one that pops my damage buff and starts my main attack in one press. Saves me a global cooldown every time.
Just keep it simple. One or two actions max. Anything more complex and you lose control.
Configuration File Tweaks
This is where you separate yourself from casual players.
Your game’s INI files control things the in-game settings menu doesn’t touch. You can turn off visual effects that look cool but tank your framerate. You can reduce particle density so you can actually see what’s happening during big fights. This is something I break down further in Masticelator Mods Releases.
I turned off screen shake entirely. Cut my spell effect quality in half. My game looks slightly less pretty but I can track targets way better now.
Here’s what to adjust first. Open your config file (usually in Documents or AppData) and find the graphics section. Look for entries like ParticleDensity or EffectQuality. Drop those values by 30 to 50 percent.
Test it. See if you notice the difference in clarity.
You might gain 10 to 15 frames too. That matters when you’re trying to react to fast combos.
Just back up your config file first (because you will mess something up eventually).
Gameplay Overhauls: The Top 3 Masticating Tool Builds
You’ve got the base tool. Now what?
Most players stick with default settings and wonder why they’re getting wrecked in later zones. I see it all the time.
The truth is, your masticating tool is only as good as the build you run. And picking the wrong mods for your playstyle? That’s how you waste hours grinding with nothing to show for it.
I’ve tested dozens of configurations. Some are garbage. But three builds stand out as genuinely worth your time.
Let me walk you through each one.
The ‘Pulverizer’ Build (Max DPS)
This is for players who want to delete enemies fast.
Stack attack speed boosters first. Then layer on critical hit amplifiers and raw damage mods. Your goal is to turn every swing into a potential one-shot.
But here’s the catch. This build drains your resource pool like crazy. You’ll burn through energy in seconds if you’re not careful (which is why I always keep backup consumables).
Your defense takes a hit too. You’re made of glass with this setup.
When should you run it? Boss fights where you need burst damage. Timed challenges. Anywhere that rewards killing things before they kill you.
The ‘Grinder’ Build (Crowd Control)
Got a swarm problem? This build handles it.
Focus on area-of-effect mods that let you hit multiple targets per swing. Add cleaving strikes for even wider coverage. Then throw in status effects like slow and stagger to keep enemies from overwhelming you.
I recommend this for anyone farming mob-heavy zones. It’s also perfect if you’re the designated crowd control in your squad.
The damage per target is lower than Pulverizer. But when you’re facing twenty enemies at once, that doesn’t matter. You’re controlling the battlefield.
Pro tip: Pair this with movement speed mods so you can reposition between swings.
The ‘Extractor’ Build (Resource Farming)
This one’s all about efficiency.
Load up on resource drop rate increases. Add material generation bonuses. Finish with life-leech effects so you can stay in the field longer without heading back to base.
Is it exciting? Not really. Will it make your farming runs twice as productive? Absolutely.
I use this build whenever I need specific materials for crafting. It’s also great for team support since you’re generating extra resources for the whole group.
The damage output is weak compared to the other builds. But that’s not the point. You’re here to collect, not compete for kill counts.
Which Build Should You Run?
Here’s my advice.
Start with Grinder if you’re new to game masticelator mods pc. It’s forgiving and works in most situations.
Switch to Pulverizer once you know enemy patterns and can dodge reliably. The damage is worth it if you can stay alive.
Save Extractor for dedicated farming sessions. Don’t waste it on regular gameplay.
And look, you can swap builds anytime. I keep three loadout presets saved so I can switch based on what I’m doing.
Test each one. See what fits your style. Then push it as far as it’ll go.
Safe Installation Practices: How to Mod Without Breaking Your Game
Most modding guides tell you to be careful.
I’m going to tell you something different. The real danger isn’t installing mods. It’s following outdated advice that makes the process harder than it needs to be.
Here’s what everyone gets wrong about mod managers. They treat them like optional tools when they’re actually required if you want to keep your sanity. I use Vortex or Mod Organizer 2 because manual installation is where most people screw up their game files. Game Masticelator Mods Minpakutoushi-Journals picks up right where this leaves off.
You know what nobody talks about? The fact that backing up your saves is pointless if you don’t also back up your ini files (those configuration files that control everything). I learned this the hard way when a texture mod corrupted my settings and I had to rebuild from scratch.
Some modders say you should download from anywhere as long as the mod looks good. That’s terrible advice. Stick to Nexus Mods or the Steam Workshop. I’ve seen people brick their installations with masticelator mods pc lag issues because they grabbed files from sketchy forums.
Here’s the truth about safe modding. You need three things: a mod manager, clean backups, and verified sources. Skip any of these and you’re gambling with your game.
Pro tip: Before installing anything new, take a screenshot of your load order. When something breaks, you’ll know exactly what changed.
Your Fully Optimized Masticating Tool Awaits
You now know how to turn the Masticating Tool into something that actually fits your playstyle.
No more settling for a generic setup that barely gets the job done. That frustration ends here.
The right masticelator mods pc version changes everything. You can build a tool that works with your strategy instead of against it.
I’ve shown you the performance tweaks and gameplay modifications that matter. Now it’s your turn to test them.
Start small. Pick one or two mods that address your biggest pain points. See how they feel in actual gameplay and adjust from there.
The best builds come from experimentation. What works for someone else might not click for you, and that’s fine.
Once you find your perfect setup, don’t keep it to yourself. Share it with the community. We all get better when we learn from each other’s discoveries.
Your customized Masticating Tool is waiting. Go build it.